


云计算实训38——docker网络、跨主机容器之间的通讯
一、docker⽹络
1.桥接--bridge
所有容器连接到桥就可以使⽤外⽹,使⽤nat让容器可以访问外⽹
使⽤ ip a s指令查看桥,所有容器连接到此桥,ip地址都是 172.17.0.0/16 ⽹段,桥是启动docker服务后出现,在centos使⽤
bridge-utils安装
1.下载bridge-utilsyum -y install bridge-utils.x86_64 2.查看桥⽂件yum provides *bin/brctl3.查看桥brctl show4.使用network查看桥docker network ls2.仅主机--host
与主机共享⽹络,可让容器连接外⽹所有容器与docker主机在同⼀个⽹络中,容器和外⽹相互访问创建⼀个新的容器[root@docker001 000]# docker run -d -p80 -v 查看ip,默认在桥上[root@docker001 000]# docker inspect a4b6|grep IPA/opt/:/usr/share/nginx/html/ centosnginx:v1 a4b6324a55e63a0966086a18519dd58fa26eaf91d0017d143d57f25312dfeb85容器仅仅有lo⽹卡,不能与外界链接,在⾼级应⽤中使⽤,lo⽹卡,⽆法链接外⽹查看ip,默认在桥上[root@docker001 000]# docker inspect a4b6|grep IPA "SecondaryIPAddresses": null, "IPAddress": "172.17.0.2", "IPAMConfig": null, "IPAddress": "172.17.0.2",绑定其他的桥[root@docker001 000]# docker run -d --network harbor_harbor centosnginx:v1 21a283fd5e684038d218892700e2b9689c0555bf2c59a554f00554bd0daca55d[root@docker001 000]# docker inspect 21a2|grep IPAdd "SecondaryIPAddresses": null, "IPAddress": "", "IPAddress": "172.19.0.11",\# 使⽤--network对⽹桥的选择绑定host主机⽹络[root@docker001 001]# docker run -it --network host yum:v0 /bin/bash[root@docker001 /]# yum -y install iprout\#内部查看ip是本地主机ip\# 外部查看ip 没有[root@docker001 001]# docker inspect 306d|grep IPAdd "SecondaryIPAddresses": null, "IPAddress": "", "IPAddress": "",主机名同真机,⽹络也同真机优点:可以直接访问容器缺点:端⼝占⽤,多容器同时运⾏⼀个服务,不建议,在测试环境中使⽤03.none
容器仅仅有lo⽹卡,不能与外界链接,在⾼级应⽤中使⽤,lo⽹卡,⽆法链接外⽹二、跨主机容器之间通讯
1.工作原理
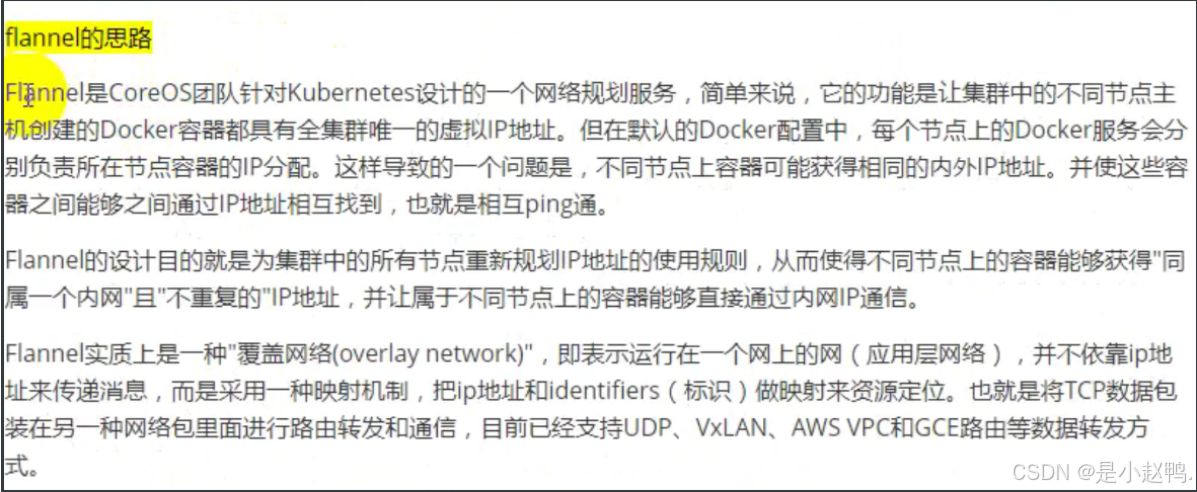
使用flannel为docker主机分配网段网段信息及ip信息保存在etcd数据库中flannel运行时,会从etcd数据库中读取配置docker的daemon文件,让docker0网卡和flannel的网段一致
2.flannel
overlay 覆盖型⽹络,不⽀持路由转发,通过数据etcd数据库保存⼦⽹信息以及⽹络分配信息
给每台主机分配⼀个⽹段 ,通过udp传输数据包
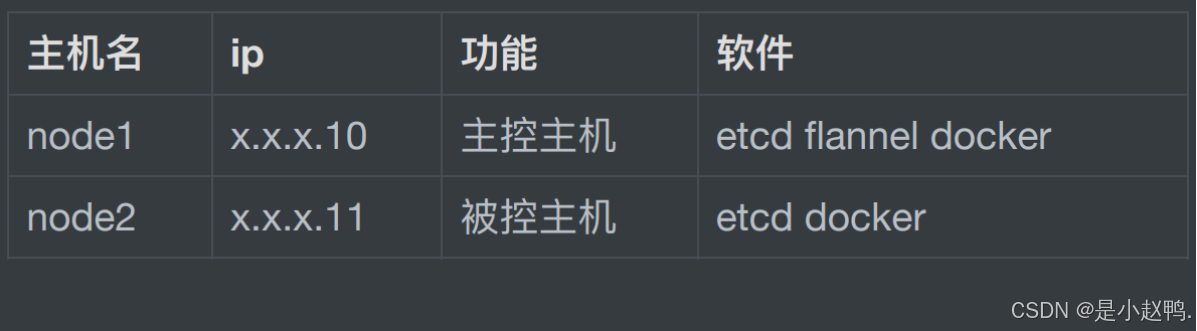
3.主控主机:node1
1.安装etcd#安装etcd数据库yum -y install etcd2.安装flannel#提供跨主机的容器网络通信yum -y install flannel3.修改etcd数据库配置编辑配置文件vim /etc/etcd/etcd.conf #----------------------------------------------------------------ETCD_LISTEN_CLIENT_URLS="http://0.0.0.0:2379,http://0.0.0.0:4001"#----------------------------------------------------------------#----------------------------------------------------------------------------ETCD_ADVERTISE_CLIENT_URLS="http://192.168.1.34:2379,http://192.168.1.34:4001"#----------------------------------------------------------------------------4.启动etcd数据库[root@node1 ~]# systemctl start etcd.service5.测试端口[root@node1 ~]# netstat -lnput | grep 2379tcp6 0 0 :::2379 :::* LISTEN 1560/etcd [root@node1 ~]# netstat -lnput | grep 4001tcp6 0 0 :::4001 :::* LISTEN 1560/etcd 6.设置开机自启动[root@node1 ~]# systemctl enable etcd.service 7.测试数据库的功能#数据的存取#使用etcd数据库存入数据[root@node1 ~]# etcdctl set testdir/testkey0 10001000#使用etcd数据库取出数据[root@node1 ~]# etcdctl get testdir/testkey01000[root@node1 ~]# etcdctl set b 123123[root@node1 ~]# [root@node1 ~]# etcdctl get b1238.测试集群健康[root@node1 ~]# etcdctl -C http://192.168.1.34:2379 cluster-healthmember 8e9e05c52164694d is healthy: got healthy result from http://192.168.1.34:2379cluster is healthy[root@node1 ~]# etcdctl -C http://192.168.1.34:4001 cluster-healthmember 8e9e05c52164694d is healthy: got healthy result from http://192.168.1.34:2379cluster is healthy9.修改flannel配置文件[root@node1 ~]# vim /etc/sysconfig/flanneld #-----------------------------------------------FLANNEL_ETCD_ENDPOINTS="http://192.168.1.34:2379"#-----------------------------------------------10.向数据库中存⼊⽹段信息[root@node1 ~]# etcdctl mk /atomic.io/network/config '{ "Network":"172.20.0.0/16"}'{ "Network":"172.20.0.0/16"}[root@node1 ~]# etcdctl get /atomic.io/network/config{ "Network":"172.20.0.0/16"}[root@node1 ~]# systemctl start flanneld.service [root@node1 ~]# systemctl enable flanneld.service 11.查看ip地址[root@node1 ~]# ip a s12.安装docker[root@node1 ~]# rz -Erz waiting to receive.[root@node1 ~]# lsanaconda-ks.cfg docker.sh[root@node1 ~]# source docker.sh [root@node1 ~]# systemctl start docker.service 13.docker服务没有开启之前查看ip[root@node1 ~]# ifconfig14.启动docker服务后查看ip[root@node1 ~]# systemctl start docker.service [root@node1 ~]# ifconfigdocker0: flags=4099 mtu 1500 inet 172.17.0.1 netmask 255.255.0.0 broadcast 172.17.255.255 ether 02:42:9c:98:9b:7c txqueuelen 0 (Ethernet) RX packets 0 bytes 0 (0.0 B) RX errors 0 dropped 0 overruns 0 frame 0 TX packets 0 bytes 0 (0.0 B) TX errors 0 dropped 0 overruns 0 carrier 0 collisions 015.从其他主机复制一份daemon.json文件[root@node1 ~]# scp [email protected]:/etc/docker/daemon.json /etc/docker/Are you sure you want to continue connecting (yes/no)? yesWarning: Permanently added '192.168.1.32' (ECDSA) to the list of known [email protected]'s password: daemon.json 100% 329 126.4KB/s 00:00 #重启docker[root@node1 ~]# systemctl restart docker.service Job for docker.service failed because the control process exited with error code. See "systemctl status docker.service" and "journalctl -xe" for details.此时出现启动不了的问题#修改配置文件[root@node1 ~]# vim /usr/lib/systemd/system/docker.serviceExecStart=/usr/bin/dockerd16.查看flannel的子网ip[root@node1 ~]# cat /run/flannel/subnet.envFLANNEL_NETWORK=172.20.0.0/16FLANNEL_SUBNET=172.20.76.1/24FLANNEL_MTU=1472FLANNEL_IPMASQ=falseFLANNEL_IPMASQ=false17.编辑daemon.json文件[root@node1 ~]# vim /etc/docker/daemon.json { "registry-mirrors": [ "https://do.nark.eu.org", "https://dc.j8.work", "https://docker.m.daocloud.io", "https://dockerproxy.com", "https://docker.mirrors.ustc.edu.cn", "https://docker.nju.edu.cn" ], "hosts":[ "tcp://0.0.0.0:2375", "unix:///var/run/docker.sock" ], "insecure-registries":[ "http://192.168.1.32:5000" ], "bip" : "172.20.16.1/24", "mtu" : 1472}18.加载配置,重启docker#重新加载daemon[root@node1 ~]# systemctl daemon-reload #重启docker[root@node1 ~]# systemctl restart docker.service 19.拉取镜像[root@node1 ~]# docker pull centos#创建容器[root@node1 ~]# docker run -it centos:latest /bin/bash[root@8848da0d2c68 /]# [root@node1 ~]# #查看容器详细信息[root@node1 ~]# docker inspect 8848da0d2c68 4.被控主机:node2
1.安装flannel[root@node2 ~]# yum -y install flannel2.配置flannel#配置flannel文件[root@node2 ~]# vim /etc/sysconfig/flanneld# Flanneld configuration options # etcd url location. Point this to the server where etcd runs#------------------------------------------------FLANNEL_ETCD_ENDPOINTS="http://192.168.1.34:2379"#------------------------------------------------#此处的ip为node1的ip# etcd config key. This is the configuration key that flannel queries# For address range assignmentFLANNEL_ETCD_PREFIX="/atomic.io/network"# Any additional options that you want to pass#FLANNEL_OPTIONS=""3.启动flannel[root@node2 ~]# systemctl start flanneld.service4.查看flannel分配的ip[root@node2 ~]# cat /run/flannel/subnet.env FLANNEL_NETWORK=172.20.0.0/16FLANNEL_SUBNET=172.20.32.1/24FLANNEL_MTU=1472FLANNEL_IPMASQ=false5.安装docker#拖拽docker.sh脚本[root@node2 ~]# rz -Erz waiting to receive.[root@node2 ~]# lsanaconda-ks.cfg docker.sh#让docker.sh脚本生效[root@node2 ~]# source docker.sh #启动docker[root@node2 ~]# systemctl start docker.service 6.配置deamon#从node1上传daemon文件到node2[root@node2 ~]# scp [email protected]:/etc/docker/daemon.json /etc/docker/Are you sure you want to continue connecting (yes/no)? [email protected]'s password: daemon.json 100% 428 274.9KB/s 00:00 #查看flannel分配的ip[root@node2 ~]# cat /run/flannel/subnet.envFLANNEL_NETWORK=172.20.0.0/16FLANNEL_SUBNET=172.20.32.1/24FLANNEL_MTU=1472FLANNEL_IPMASQ=false#修改daemon.json文件[root@node2 ~]# vim /etc/docker/daemon.json { "registry-mirrors": [ "https://do.nark.eu.org", "https://dc.j8.work", "https://docker.m.daocloud.io", "https://dockerproxy.com", "https://docker.mirrors.ustc.edu.cn", "https://docker.nju.edu.cn" ], "hosts":[ "tcp://0.0.0.0:2375", "unix:///var/run/docker.sock" ], #---------------------------------------- "insecure-registries":[ "http://192.168.1.32:5000" ], "bip" : "172.20.32.1/24", "mtu" : 1472 #----------------------------------------}#修改docker.service文件[root@node2 ~]# vim /usr/lib/systemd/system/docker.serviceExecStart=/usr/bin/dockerd7.重启daemon#此时重启docker会出现以下错误,按步骤操作即可[root@node2 ~]# systemctl restart docker.service Warning: docker.service changed on disk. Run 'systemctl daemon-reload' to reload units.Job for docker.service failed because the control process exited with error code. See "systemctl status docker.service" and "journalctl -xe" for details.#重新加载daemon[root@node2 ~]# systemctl daemon-reload#重新启动docker服务[root@node2 ~]# systemctl restart docker.service 8.拉取centos镜像[root@node2 ~]# docker pull centos#创建容器[root@node2 ~]# docker run -it centos:latest /bin/bash[root@33d47b2e38ce /]##使用ctrl p+q 退出#查看容器的详细信息[root@node2 ~]# docker inspect 33d"Gateway": "172.20.32.1", "GlobalIPv6Address": "", "GlobalIPv6PrefixLen": 0, "IPAddress": "172.20.32.2", "IPPrefixLen": 24, "IPv6Gateway": "", "MacAddress": "02:42:ac:14:20:02",9.ping node1中容器的ip[root@node2 ~]# ping 172.20.76.1PING 172.20.76.1 (172.20.76.1) 56(84) bytes of data.64 bytes from 172.20.76.1: icmp_seq=1 ttl=62 time=1.14 ms64 bytes from 172.20.76.1: icmp_seq=2 ttl=62 time=0.989 ms64 bytes from 172.20.76.1: icmp_seq=3 ttl=62 time=0.833 ms64 bytes from 172.20.76.1: icmp_seq=4 ttl=62 time=0.772 ms^C--- 172.20.76.1 ping statistics ---分享让更多人看到 
热门排行
- 1超详细!!!一文理解PrimeDepth: Efficient Monocular Depth Estimation with a Stable Diffusion Preimage
- 2HZR12海尔中央软水器
- 3胖东起诉经济学家宋清辉索赔百万 后者说死敲到底:曾公开喊鼓励加班
- 4《Spark 编程基础(Scala 版)》第 6 章 Spark SQL 实验 5 Spark SQL 编程初级实践 (超级详细版)
- 5胖东起诉经济学家宋清辉索赔百万 后者说死敲到底:曾公开喊鼓励加班
- 6荣耀HONOR X60 5G手机轻薄长寿命893元
- 7Kafka 深入服务端 — 时间轮
- 8传统类 哪一款Rogue游戏最好玩? 热门传统类 精选Rogue游戏
- 9Unity3D开发AI桌面精灵/宠物系列 【一】 窗口透明化 背景剔除 、去边框、去Logo动画UI正常显示
- 10基于文字的游戏哪个好玩? 基于文字的最新游戏库存
人民日报社概况| 关于人民网| 报社招聘| 招聘英才| 广告服务| 合作加盟| 供稿服务| 数据服务| 网站声明| 网站律师| 信息保护| 联系我们
人民日报违法和不良信息举报电话:010-65363263 举报邮箱:jubao@people.cn
人民网服务邮箱:kf@people.cn 违法和不良信息举报电话:010-65363636 举报邮箱:rmwjubao@people.cn
互联网新闻信息服务许可证10120170001 | 增值电信业务经营许可证B1-20060139 | 广播电视节目制作经营许可证(广媒)字第172号 | 京ICP备12004265号-13
信息网络传播视听节目许可证0104065 | 网络文化经营许可证 京网文[2023]4961-141号 | 网络出版服务许可证(京)字121号 | 京ICP证000006号 | 京公网安备11000002000008号
人 民 网 股 份 有 限 公 司 版 权 所 有 ,未 经 书 面 授 权 禁 止 使 用
Copyright © 1997-2024 by www.people.com.cn. all rights reserved


